|
|
Home | Switchboard | Unix Administration | Red Hat | TCP/IP Networks | Neoliberalism | Toxic Managers |
| (slightly skeptical) Educational society promoting "Back to basics" movement against IT overcomplexity and bastardization of classic Unix | |||||||
| ...some regard the management of software development akin to the management of
manufacturing, which can be performed by someone with
management skills, but no programming skills. John C.
Reynolds rebuts this view, and argues that software development is entirely design work, and compares a manager
who cannot program to the managing editor of a newspaper who cannot write.[3]
Software project management |
|
|
Although documentation is very important software projects rarely fail due to lack of "progress reports". The main reasons are unrealistic goals, incompetent managers as well as lack of communication and collaboration. Also for complex software project any initial specifications are by definition fuzzy and incomplete. Software development is a practical art of adapting means to ends in accordance with always changing conditions (including advanced in hardware). Like in war there is a fog all over the place and no large software development plan outlasts the first encounter with the reality (that's why prototyping approach has such a high value). But here we will not talk about this important problem but about quite another one, equally important. One of the main dangers in IT in general and software development in particular is Project micromanagement
Micromanagement as a business term has one of the most negative connotations. Saying "He's a micromanager." is essentially the same as, "He is driving me crazy", or, less politely, "He/she is a jerk." But situations when you are forced to work for a bad project manager are much broader that that. Such situations include a lot of less extreme, but still quite painful variants. Here is the relevant quote from How to survive a bad manager - scottberkun.com
The best advice for having a bad manager is to seek other employment. Don’t undervalue your happiness: it’s impossible to be happy if you work directly for someone you can’t stand. It may be difficult to find another job, but if you are willing to make compromises in other areas (salary, position, project, location, etc.) it will certainly be possible. Being happy and underpaid is a much better way to spend a life than unhappy and anything else.
Making life changes, even progressive beneficial ones, is difficult and leaving a bad manager might require weeks or months of less than pleasant living. However, on the other side of any decision to leave is something you can’t get where you currently are: the possibility of a good manager, and the sanity that it will bring you. The “never quit, tough it out” attitude is a mistake if you are in a situation that can never result in your satisfaction. I think the act of finding a new job, or even quitting before you've found one, can be a way to take more control. It puts you back at center of your life, where you belong. There are risks involved, but it puts you, and not your manager or company, at the center of them.
But for the sake of this essay I’ll assume that you are either unwilling or unable to leave. Maybe you’re looking for something new and have to endure a bad manager until you’ve found it, or perhaps your family is heavily dependent on you and your options are limited. That’s fine. Just remember to re-read the first paragraph every month or so to make sure you’re considering all your choices, and not hiding behind the deceptive safety of a merely acceptable job, when what you need is something more.
How bad is your manager?
There are many different factors that contribute to negative opinions of managers. It’s not the goal of this essay to list them all, but here are some of the basics:
- Inconsistent: Says one thing, does something else.
- Arrogant. Always believes they are right, and makes sure you know it.
- Egocentric. Makes every issue and decision about them.
- Doesn’t listen: is offered advice but ignores it before even considering it.
- Self-centered: Doesn’t support, encourage or look out for their team.
- Mean/Abusive: Makes people feel bad for no reason.
- Micro-manager: Refuses to delegate anything, despite what they say.
- Coward: Backs down whenever challenged.
- Isolated: doesn’t involve others in decisions, and rarely looks for ways to support/encourage the work of their team.
- Incompetent: Lacks basic communication, intellectual, or emotional skills needed to for their role.
- Checked out: Isn’t committed to their work or their team.
Skimming this list should have one of two effects: Either you are now certain you have the worst manager in the history of civilization, or you’ve recognized a few bad traits that your manager does not have. If you are in the former group please re-read the first paragraph of this essay. Odds are good you can do better.
For most of you the above list should point out a few bad qualities your manager does not have. This is good. You should take a moment to imagine how much worse it could be (picture an evil manager, wearing a red cape, in a dark dungeon of a cubicle farm, laughing to himself as he uses the list above as a checklist for his daily activities). If you can see some behavior in your manager than isn’t as bad as others there is room for you to make better use of your manager.
|
|
In modern IT corporation having an report to a micromanager as a subordinate at some point of your career is as inevitable as death and taxes.
Micromanager is probably the most popular subcategory of toxic managers or, in less politically correct terms, a special type of corporate psychopath (if we are talking about extreme cases). It's all about power and micromanaging is one of the worst form of exerting excessive power over subordinates, very destructive for the company behaviour indeed. From purely organizational standpoint micro-management is a management style that typically results in degraded performance. The only exceptions are cases when the manager is a super-competent visionary, but even in this case your mileage can vary.
Knowing how to deal with micromanager is a skill that is not easily acquired nor mastered, but is an essential requirement to your survival in large corporation environment and, often the key to preservation of your physical and, especially, psychical health. Negative health effects are usually typical consequence of the combination of a workaholic culture and chronic toxic stress inflicted by control freaks: they are similar to combat stress. In milder form micromanagement is rampant. According to some surveys nearly eight out of ten employees are victims of a micromanaging boss at some point of their career.
If we consider bulling as most typical behavior of corporate psychopath in general and micromanagers in particular, then data suggest that:
A the same time I would like to warn that "Control freak" is one of those terms for which the meaning is starting to get distorted and became a nasty little clutch:
Usually psychopaths constitute around 1% of human population. Even if we assume that in management position the concentration is 10 times higher due to natural selection still that gives us 10% as an estimate. So the real number should probably be in single digits or low teens.
The adaptation to working with control freak is always difficult and, as a rule, creates habits of thinking and acting that can be dysfunctional in "normal" office environment and your future jobs. Few people are completely unchanged or unscathed by the experience. Some scars are inevitable. At the very least, such person typically suffers long-term consequences from having been subjected to outbursts of anger, danger of exclusion, deprivation of vital information, and other extremely atypical patterns and norms of interacting with a control freak.
At the same time control freak do not, in general, make people "crazy." But there is definitely a psychological damage. Some experience "flashbacks" like solders suffering from PTSD (Coping With Flashbacks and Dissociation in PTSD) for a couple of years, but they gradually subside. The most lasting psychological damage, at least for some people, includes negative changes of behavioral patterns.
The various psychological mechanisms that must be employed to adjust (and, to survive) become increasingly "natural," second nature, and, to a degree, internalized. Such a process is subtle and difficult to discern as it occurs. As office clearly became a dangerous places people rather quickly become hyper-vigilant and alert for signs of threat or personal risk.
|
As office clearly became a dangerous places people rather quickly become hyper-vigilant and alert for signs of threat or personal risk. |
Because the stakes are high, and because there are people in their immediate environment (and first of all control freak) poised to take advantage of weakness or exploit carelessness or inattention, interpersonal distrust and suspicion develops as a defense mechanism.
Emotional over-control and a generalized lack of spontaneity may occur as a result. Admissions of vulnerability are potentially dangerous because they invite exploitation. Office becomes something like a part-time prison, a barely controlled jungle where the aggressive and the strong exploits the weak, and the weak are dreadfully aware of it.
Like prisoners, such office workers are forced to become remarkably skilled "self-monitors" who calculate the anticipated effects that every aspect of their behavior, and such calculations became a second nature.
Some learn to find safety in social invisibility by becoming as inconspicuous and unobtrusively disconnected from others as possible. The self-imposed social withdrawal and isolation may mean that they retreat deeply into themselves, trust virtually no one and leading isolated lives of quiet desperation. In extreme cases this pattern of behaviour closely resembles that of clinical depression. Diminished sense of self-worth and personal value are also pretty typical in such cases.
|
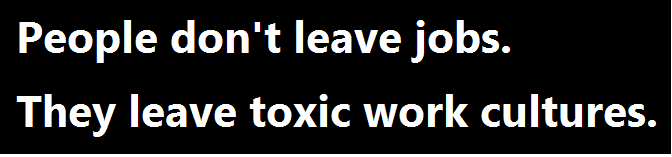
As office wisdom suggests "people don't quit their jobs; they quit their bosses." |
As office wisdom suggests "people don't quit their jobs; they quit their bosses." According to Merriam-Webster micro-management is “managing especially with excessive control or attention to details”. Wikipedia also noted that micro-management was “generally seen with a negative connotation”. Professional management consultants generally agree that
"…micro-managers cause serious problems for their staff members and for the companies that employ them". It is important to understand that in its essence "
Micro-management is a personality aberration of insecure individuals. In other words it is driven by deep and overwhelming feeling of personal insecurity, which is suppressed and transformed info desire for excessive control. Such behavior often in borderline insane and in a very deep sense of this word irrational. That means that it is naive to expect the ability to react to logical, rational augments by the affected individual. In a deep sense of the word they are "possessed" by their desire to control everything. Often with the price being their own health and the health of their subordinates. It's a form of addition to power.
|
Control freaks are driven by deep and overwhelming feeling of personal insecurity, which is suppressed and transformed info desire for excessive control. In a deep sense of the word they are "possessed" by their desire to control everything. Often with the price being their own health and the health of their subordinates. It's a form of addition to power. |
In IT environment paranoid micromanagers flourish due to stagnation and bureaucratization of many IT departments as well as excessive centralization and downsizing trends. Paradoxically due to downsizing and offshoring micromanagers had found in IT especially fertile ground. While micromanagers constitute a significant subset of managers in any large corporation, they are especially destructive in software development environment, may be due the complexity of the environment in which programmers operates.
If we are talking about micromanagement we usually assume significant level of incompetence. Extremely competent manager usually does not produce such a strong allergic reaction. People try to follow their direction more eagerly and most people like to learn something form people who are superior to them in their chosen specialty. Although everything has its limits.
This page is written as a self-help material for those who need to buy some time or are unwilling or incapable to leave ASAP. It is important to understand that it such situation you cannot hide in your cubicle; this is a war more resembling hand combat in the trenches. Do not take your situation lightly. This is a very serious personal situation that can deeply affect your career and health.
|
Do not take your situation lightly. This is a very serious personal situation that can deeply affect your career and health. |
And if micromanager is toxic, then despite your best efforts you might be not able to survive for long. Unless you are prepared on the level of Green Berets (which should become your role model anyway, at least as long as you stay in this environment ;-) you might not be in the same office the next year, the next month, or after another (negative) performance review. If you want to stay (for example, buying some time to obtain some important certification) you might be suffering post traumatic stress syndrome after leaving this environment. Like is the case with many solders who spent some time at the front lines: chronic stress destroys most humans really fast.
Still it is useful to understand that micro-managers came in various flavors and can combine features of different types of sociopaths. It also important to understand how severe your case really is. Also they are not on "permanently high" and degree of debilitating over-control can vary in intensity depending of the general environment and particular psychological state of the individual micromanager. Failures usually increase intensity of this style.
Studying and documenting your particular micromanagers behaviour might help you to find more optimal line of behaviour in typical situations and adapt your communication and behaviors to keep a safe social distance form such an individual. See, for example, Negative Politeness. What is more important, better understanding (which is achievable only via maintaining written log of event, for example in form of the diary) tend to lessen the level of stress you are experiencing. As soon as you see repeating pattern in the behavior of your boss you will have much lesser level of stress then a person for whom boss behavior remains unpredictable. Repetitive patterns of actions are actually more common for micromanagers then even for Authoritarians, who come close next.
That's why keeping a diary at home and writing to it each evening is so important: it helps to reveal such repeatable patterns of behavior, make the particular more predictable and less new encounters with him/her less threatening emotionally. In other words writing your personal diary each night reduce chronic stress, that you are subjected in such an environment and improves your situational awareness. Higher situational awareness is the key for preventing blunders.
|
Keeping a diary at home and writing to it each evening is so important: it helps to reveal such repeatable patterns of behavior, make the particular more predictable and less new encounters with him/her less threatening emotionally. In other words writing your personal diary each night reduce chronic stress, that you are subjected in such an environment and improves your situational awareness. Higher situational awareness is the key for preventing blunders. |
Notes
The less we speak, the more we learn;
the more we learn the less we speak
Pigeonholing is a term used to describe processes that attempt to classify disparate entities into a small number of categories (usually, mutually exclusive ones).
The expression usually carries connotations of criticism, implying that the classification scheme referred to does not adequately reflect the entities being sorted, or that it is based on stereotypes.
Common failings of pigeonholing schemes include:
- Categories are poorly defined (often because they are subjective).
- Entities may be suited to more than one category. Example: rhubarb is both 'poisonous' and 'edible'.
- Entities may not fit into any available category. Example: asking somebody from Washington, DC which state they live in.
- Entities may change over time, so they no longer fit the category in which they have been placed. Example: certain species of fish may change from male to female during their life.
- Attempting to assigned fixed set of categories for traits that would be better viewed as a continuum. Example: attempting to sort people into 'introverted' and 'extroverted'. ....
DO be direct, courteous and calm
DON'T be rude and pushy
DO spare others your unsolicited advice
DON'T be patronizing, superior or sarcastic
DO acknowledge that what works for you may not work for others
DON'T make personal attacks or insinuations
DO say main points first, then offer more details if necessary
DON'T expect others to follow your advice or always agree with you
DO listen for hidden feelings
DON'T suggest changes that a person can not easily make.
Rule No.1 is not volunteering any information. The less you communicate, the better (within certain limits). Forget about advice of the type "let's clear the air, clean the slate, have a sit down, face-to-face, heart-to-heart meeting. In the business cancelling industry the solution is better communication/ But even genius communicator cannot do much facing mean spirited, easily threatened corporate psychopath, who is, simply put, a nut case. Often it's worth not to communicate especially if you know that situation is changing or could change soon.
| Rule No.1 is not volunteering any information. The less you communicate, the better (within certain limits). Forget about advice of the type "let's clear the air, clean the slate, have a sit down, face-to-face, heart-to-heart meeting. |
Also forget useless crap about "lower your expectations and live happy" or "the power of positive thinking". It can serve as a useful sedative especially if you play it during your daily commute to work with a corporate psychopath, but that's about it. There is much more here then just a communication problem. And there is such thing as talking to the wall -- that's exactly the case when you deal with corporate psychopath be it micromanager, narcissist, bully or some other flavor.
Consider any conversation with those types to be more like courts deposition then a free conversation as the goals of corporate psychopath are the same as hostile lawyer during depositions. Each your slip can be used against you. Here is one usable set of recommendations from Court Appearance and Deposition - Divorce Question
Be polite. Always say: "Yes, sir," or "No, ma'am," .... Never argue with anyone. ... Do not tell jokes or say anything sarcastic... Listen carefully to every question. Pause before answering, make sure you understand the question, think, and then be direct with your answer.
Answer only the question asked of you, and then stop talking. Do not add any commentary. One of the oldest (and most effective) techniques is, once you've given your answer, the lawyer looks at you as if to say: "Keep talking." Do not fall into this trap. Just look back at him calmly and politely as if to say: "I am waiting on you to ask another question."
... ... ...
If you do not understand a question, ask for the question to be repeated... If you think you are speaking too fast, stop, pause for a second or two, slow down, then finish your answer. You are not in a conversation.
The regular rules of human interaction do not apply. ... If you lose your temper, you may lose your case.
Never begin answers with the phrases: "To the best of my recollection," or "I do not recall." Most people will think of President Clinton. Simply say, "I don't know."
See also Five Points Verbal Response Test
A helpful tip that simplifies communication with corporate psychopath is to imagine yourself in torture camera with an inquisitor presiding questioning you. Or deposition in a court.
|
|
Switchboard | ||||
| Latest | |||||
| Past week | |||||
| Past month | |||||
Apr 21, 2021 | www.redhat.com
When introducing a new tool, programming language, or dependency into your environment, what steps do you take to evaluate it? In this article, I will walk through a six-question framework I use to make these determinations.
What problem am I trying to solve?We all get caught up in the minutiae of the immediate problem at hand. An honest, critical assessment helps divulge broader root causes and prevents micro-optimizations.
[ You might also like: Six deployment steps for Linux services and their related tools ]
Let's say you are experiencing issues with your configuration management system. Day-to-day operational tasks are taking longer than they should, and working with the language is difficult. A new configuration management system might alleviate these concerns, but make sure to take a broader look at this system's context. Maybe switching from virtual machines to immutable containers eases these issues and more across your environment while being an equivalent amount of work. At this point, you should explore the feasibility of more comprehensive solutions as well. You may decide that this is not a feasible project for the organization at this time due to a lack of organizational knowledge around containers, but conscientiously accepting this tradeoff allows you to put containers on a roadmap for the next quarter.
This intellectual exercise helps you drill down to the root causes and solve core issues, not the symptoms of larger problems. This is not always going to be possible, but be intentional about making this decision.
In the cloudDoes this tool solve that problem?
- Understanding cloud computing
- Free course: Red Hat OpenStack Technical Overview
- Free e-book: Hybrid Cloud Strategy for Dummies
Now that we have identified the problem, it is time for critical evaluation of both ourselves and the selected tool.
A particular technology might seem appealing because it is new because you read a cool blog post about it or you want to be the one giving a conference talk. Bells and whistles can be nice, but the tool must resolve the core issues you identified in the first question.
What am I giving up?The tool will, in fact, solve the problem, and we know we're solving the right problem, but what are the tradeoffs?
These considerations can be purely technical. Will the lack of observability tooling prevent efficient debugging in production? Does the closed-source nature of this tool make it more difficult to track down subtle bugs? Is managing yet another dependency worth the operational benefits of using this tool?
Additionally, include the larger organizational, business, and legal contexts that you operate under.
Are you giving up control of a critical business workflow to a third-party vendor? If that vendor doubles their API cost, is that something that your organization can afford and is willing to accept? Are you comfortable with closed-source tooling handling a sensitive bit of proprietary information? Does the software licensing make this difficult to use commercially?
While not simple questions to answer, taking the time to evaluate this upfront will save you a lot of pain later on.
Is the project or vendor healthy?This question comes with the addendum "for the balance of your requirements." If you only need a tool to get your team over a four to six-month hump until Project X is complete, this question becomes less important. If this is a multi-year commitment and the tool drives a critical business workflow, this is a concern.
When going through this step, make use of all available resources. If the solution is open source, look through the commit history, mailing lists, and forum discussions about that software. Does the community seem to communicate effectively and work well together, or are there obvious rifts between community members? If part of what you are purchasing is a support contract, use that support during the proof-of-concept phase. Does it live up to your expectations? Is the quality of support worth the cost?
Make sure you take a step beyond GitHub stars and forks when evaluating open source tools as well. Something might hit the front page of a news aggregator and receive attention for a few days, but a deeper look might reveal that only a couple of core developers are actually working on a project, and they've had difficulty finding outside contributions. Maybe a tool is open source, but a corporate-funded team drives core development, and support will likely cease if that organization abandons the project. Perhaps the API has changed every six months, causing a lot of pain for folks who have adopted earlier versions.
What are the risks?As a technologist, you understand that nothing ever goes as planned. Networks go down, drives fail, servers reboot, rows in the data center lose power, entire AWS regions become inaccessible, or BGP hijacks re-route hundreds of terabytes of Internet traffic.
Ask yourself how this tooling could fail and what the impact would be. If you are adding a security vendor product to your CI/CD pipeline, what happens if the vendor goes down?
Kubernetes and OpenShift
- Free cheatsheet: Kubernetes and Minikube
- Free ebook: Designing Cloud-Native Applications
- Interactive course: Getting Started with OpenShift
- Free ebook: Build Applications with Kubernetes and Openshift
This brings up both technical and business considerations. Do the CI/CD pipelines simply time out because they can't reach the vendor, or do you have it "fail open" and allow the pipeline to complete with a warning? This is a technical problem but ultimately a business decision. Are you willing to go to production with a change that has bypassed the security scanning in this scenario?
Obviously, this task becomes more difficult as we increase the complexity of the system. Thankfully, sites like k8s.af consolidate example outage scenarios. These public postmortems are very helpful for understanding how a piece of software can fail and how to plan for that scenario.
What are the costs?The primary considerations here are employee time and, if applicable, vendor cost. Is that SaaS app cheaper than more headcount? If you save each developer on the team two hours a day with that new CI/CD tool, does it pay for itself over the next fiscal year?
Granted, not everything has to be a cost-saving proposition. Maybe it won't be cost-neutral if you save the dev team a couple of hours a day, but you're removing a huge blocker in their daily workflow, and they would be much happier for it. That happiness is likely worth the financial cost. Onboarding new developers is costly, so don't underestimate the value of increased retention when making these calculations.
[ A free guide from Red Hat: 5 steps to automate your business . ]
Wrap upI hope you've found this framework insightful, and I encourage you to incorporate it into your own decision-making processes. There is no one-size-fits-all framework that works for every decision. Don't forget that, sometimes, you might need to go with your gut and make a judgment call. However, having a standardized process like this will help differentiate between those times when you can critically analyze a decision and when you need to make that leap.
Oct 15, 2019 | www.linkedin.com
Whenever a boss acts like a dictator – shutting down, embarrassing, or firing anyone who dares to challenge the status quo – you've got a toxic workplace problem. And that's not just because of the boss' bad behavior, but because that behavior creates an environment in which everyone is scared, intimidated and often willing to throw their colleagues under the bus, just to stay on the good side of the such bosses.
... ... ...
10 Signs your workplace culture is Toxic
- Company core values do not serve as the basis for how the organization functions.
- Employee suggestions are discarded. People are afraid to give honest feedback.
- Micromanaging -Little to no autonomy is given to employees in performing their jobs.
- Blaming and punishment from management is the norm.
- Excessive absenteeism, illness and high employee turn over.
- Overworking is a badge of honor and is expected.
- Little or strained interaction between employees and management.
- Gossiping and/or social cliques.
- Favoritism and office politics.
- Aggressive or bullying behavior.
fbi.gov
Façade
It is fascinating that psychopaths can survive and thrive in a corporate environment. Day-to-day interactions with coworkers, coupled with business policies and procedures, should make unmasking them easy, but this does not always hold true. Large companies' command-and-control functions ought to make dealing with them simple and direct; however, this may not be the case.
Psychopathic manipulation usually begins by creating a mask, known as psychopathic fiction, in the minds of those targeted. In interpersonal situations, this façade shows the psychopath as the ideal friend, lover, and partner. These individuals excel at sizing up their prey. They appear to fulfill their victims' psychological needs, much like the grooming behavior of molesters. Although they sometimes appear too good to be true, this persona typically is too grand to resist. They play into people's basic desire to meet the right person-someone who values them for themselves, wants to have a close relationship, and is different from others who have disappointed them. Belief in the realism of this personality can lead the individual to form a psychopathic bond with the perpetrator on intellectual, emotional, and physical levels. At this point, the target is hooked and now has become a psychopathic victim.
Corporate psychopaths use the ability to hide their true selves in plain sight and display desirable personality traits to the business world. To do this, they maintain multiple masks at length. The façade they establish with coworkers and management is that of the ideal employee and future leader. This can prove effective, particularly in organizations experiencing turmoil and seeking a "knight in shining armor" to fix the company.
Con
How is it possible for psychopaths to fool business-savvy executives and employers? They often use conning skills during interviews to convince their hiring managers that they have the potential for promotion and the knowledge, skills, and abilities to do an outstanding job. Using their lying skills, they may create phony resumes and fictitious work experience to further their claims. They may manipulate others to act as references. Credentials, such as diplomas, performance awards, and trophies, often are fabricated.
Psychopathic manipulation usually begins by creating a mask, known as a psychopathic fiction, in the minds of those targeted. Once inside the organization, corporate psychopaths capitalize on others' expectations of a commendable employee. Coworkers and managers may misread superficial charm as charisma, a desirable leadership trait. A psychopath's grandiose talk can resemble self-confidence, while subtle conning and manipulation often suggest influence and persuasion skills. Sometimes psychopaths' thrill-seeking behavior and impulsivity are mistaken for high energy and enthusiasm, action orientation, and the ability to multitask. To the organization, these individuals' irresponsibility may give the appearance of a risk-taking and entrepreneurial spirit-highly prized in today's fast-paced business environment. Lack of realistic goal setting combined with grandiose statements can be misinterpreted as visionary and strategic thinking ability; both are rare and sought after by senior management. An inability to feel emotions may be disguised as the capability to make tough decisions and stay calm in the heat of battle.
Damage
Evidence suggests that when participating in teams, corporate psychopaths' behaviors can wreak havoc. In departments managed by psychopaths, their conduct decreases productivity and morale. These issues can have a severe impact on a company's business performance.
There also is the risk for economic crimes to be committed. For the corporate executive and the criminal justice professional, the issue is the possibility of fraud. Today's corporate psychopath may be highly educated-several with Ph.D., M.D., and J.D. degrees have been studied-and capable of circumventing financial controls and successfully passing corporate audits.
Investigation
Investigators should familiarize themselves with the typical traits and characteristics of psychopaths. They must understand the manipulation techniques used to create and manage the psychopathic bonds established with victim organizations. Their reputations, as judged by those in power with whom they have bonded, known as patrons, often provide added protection from closer investigation. As a result, the investigator may need to build a case with management for the use and broad application of more sophisticated techniques
July 1, 2005 | Fast Company
Odds are you've run across one of these characters in your career. They're glib, charming, manipulative, deceitful, ruthless - and very, very destructive. And there may be lots of them in America's corner offices.
One of the most provocative ideas about business in this decade so far surfaced in a most unlikely place. The forum wasn't the Harvard Business School or one of those $4,000-a-head conferences where Silicon Valley's venture capitalists search for the next big thing. It was a convention of Canadian cops in the far-flung province of Newfoundland. The speaker, a 71-year-old professor emeritus from the University of British Columbia, remains virtually unknown in the business realm. But he's renowned in his own field: criminal psychology. Robert Hare is the creator of the Psychopathy Checklist. The 20-item personality evaluation has exerted enormous influence in its quarter-century history. It's the standard tool for making clinical diagnoses of psychopaths - the 1% of the general population that isn't burdened by conscience. Psychopaths have a profound lack of empathy. They use other people callously and remorselessly for their own ends. They seduce victims with a hypnotic charm that masks their true nature as pathological liars, master con artists, and heartless manipulators. Easily bored, they crave constant stimulation, so they seek thrills from real-life "games" they can win - and take pleasure from their power over other people.
On that August day in 2002, Hare gave a talk on psychopathy to about 150 police and law-enforcement officials. He was a legendary figure to that crowd. The FBI and the British justice system have long relied on his advice. He created the P-Scan, a test widely used by police departments to screen new recruits for psychopathy, and his ideas have inspired the testing of firefighters, teachers, and operators of nuclear power plants.
According to the Canadian Press and Toronto Sun reporters who rescued the moment from obscurity, Hare began by talking about Mafia hit men and sex offenders, whose photos were projected on a large screen behind him. But then those images were replaced by pictures of top executives from WorldCom, which had just declared bankruptcy, and Enron, which imploded only months earlier. The securities frauds would eventually lead to long prison sentences for WorldCom CEO Bernard Ebbers and Enron CFO Andrew Fastow.
"These are callous, cold-blooded individuals," Hare said.
"They don't care that you have thoughts and feelings. They have no sense of guilt or remorse." He talked about the pain and suffering the corporate rogues had inflicted on thousands of people who had lost their jobs, or their life's savings. Some of those victims would succumb to heart attacks or commit suicide, he said.
Then Hare came out with a startling proposal. He said that the recent corporate scandals could have been prevented if CEOs were screened for psychopathic behavior. "Why wouldn't we want to screen them?" he asked. "We screen police officers, teachers. Why not people who are going to handle billions of dollars?"\
It's Hare's latest contribution to the public awareness of "corporate psychopathy." He appeared in the 2003 documentary The Corporation, giving authority to the film's premise that corporations are "sociopathic" (a synonym for "psychopathic") because they ruthlessly seek their own selfish interests - "shareholder value" - without regard for the harms they cause to others, such as environmental damage.
Is Hare right? Are corporations fundamentally psychopathic organizations that attract similarly disposed people? It's a compelling idea, especially given the recent evidence. Such scandals as Enron and WorldCom aren't just aberrations; they represent what can happen when some basic currents in our business culture turn malignant. We're worshipful of top executives who seem charismatic, visionary, and tough. So long as they're lifting profits and stock prices, we're willing to overlook that they can also be callous, conning, manipulative, deceitful, verbally and psychologically abusive, remorseless, exploitative, self-delusional, irresponsible, and megalomaniacal. So we collude in the elevation of leaders who are sadly insensitive to hurting others and society at large.
But wait, you say: Don't bona fide psychopaths become serial killers or other kinds of violent criminals, rather than the guys in the next cubicle or the corner office? That was the conventional wisdom. Indeed, Hare began his work by studying men in prison. Granted, that's still an unusually good place to look for the conscience-impaired. The average Psychopathy Checklist score for incarcerated male offenders in North America is 23.3, out of a possible 40. hic," the range for the most violent offenders. Hare has said that the typical citizen would score a 3 or 4, while anything below that is "sliding into sainthood."
On the broad continuum between the ethical everyman and the predatory killer, there's plenty of room for people who are ruthless but not violent. This is where you're likely to find such people as Ebbers, Fastow, ImClone CEO Sam Waksal, and hotelier Leona Helmsley. We put several big-name CEOs through the checklist, and they scored as "moderately psychopathic"; our quiz on page 48 lets you try a similar exercise with your favorite boss. And this summer, together with New York industrial psychologist Paul Babiak, Hare begins marketing the B-Scan, a personality test that companies can use to spot job candidates who may have an MBA but lack a conscience. "I always said that if I wasn't studying psychopaths in prison, I'd do it at the stock exchange," Hare told Fast Company. "There are certainly more people in the business world who would score high in the psychopathic dimension than in the general population. You'll find them in any organization where, by the nature of one's position, you have power and control over other people and the opportunity to get something."
There's evidence that the business climate has become even more hospitable to psychopaths in recent years. In pioneering long-term studies of psychopaths in the workplace, Babiak focused on a half-dozen unnamed companies: One was a fast-growing high-tech firm, and the others were large multinationals undergoing dramatic organizational changes - severe downsizing, restructuring, mergers and acquisitions, and joint ventures. That's just the sort of corporate tumult that has increasingly characterized the U.S. business landscape in the last couple of decades. And just as wars can produce exciting opportunities for murderous psychopaths to shine (think of Serbia's Slobodan Milosevic and Radovan Karadzic), Babiak found that these organizational shake-ups created a welcoming environment for the corporate killer. "The psychopath has no difficulty dealing with the consequences of rapid change; in fact, he or she thrives on it," Babiak claims. "Organizational chaos provides both the necessary stimulation for psychopathic thrill seeking and sufficient cover for psychopathic manipulation and abusive behavior."
And you can make a compelling case that the New Economy, with its rule-breaking and roller-coaster results, is just dandy for folks with psychopathic traits too. A slow-moving old-economy corporation would be too boring for a psychopath, who needs constant stimulation. Its rigid structures and processes and predictable ways might stymie his unethical scheming. But a charge-ahead New Economy maverick - an Enron, for instance - would seem the ideal place for this kind of operator.
But how can we recognize psychopathic types? Hare has revised his Psychopathy Checklist (known as the PCL-R, or simply "the Hare") to make it easier to identify so-called subcriminal or corporate psychopaths. He has broken down the 20 personality characteristics into two subsets, or "factors." Corporate psychopaths score high on Factor 1, the "selfish, callous, and remorseless use of others" category. It includes eight traits: glibness and superficial charm; grandiose sense of self-worth; pathological lying; conning and manipulativeness; lack of remorse or guilt; shallow affect (i.e., a coldness covered up by dramatic emotional displays that are actually playacting); callousness and lack of empathy; and the failure to accept responsibility for one's own actions. Sound like anyone you know? (Corporate psychopaths score only low to moderate on Factor 2, which pinpoints "chronically unstable, antisocial, and socially deviant lifestyle," the hallmarks of people who wind up in jail for rougher crimes than creative accounting.)
This view is supported by research by psychologists Belinda Board and Katarina Fritzon at the University of Surrey, who interviewed and gave personality tests to 39 high-level British executives and compared their profiles with those of criminals and psychiatric patients. The executives were even more likely to be superficially charming, egocentric, insincere, and manipulative, and just as likely to be grandiose, exploitative, and lacking in empathy. Board and Fritzon concluded that the businesspeople they studied might be called "successful psychopaths." In contrast, the criminals - the "unsuccessful psychopaths" - were more impulsive and physically aggressive.
The Factor 1 psychopathic traits seem like the playbook of many corporate power brokers through the decades.
- Manipulative? Louis B. Mayer was said to be a better actor than any of the stars he employed at MGM, able to turn on the tears at will to evoke sympathy during salary negotiations with his actors.
- Callous? Henry Ford hired thugs to crush union organizers, deployed machine guns at his plants, and stockpiled tear gas. He cheated on his wife with his teenage personal assistant and then had the younger woman marry his chauffeur as a cover.
- Lacking empathy? Hotel magnate Leona Helmsley shouted profanities at and summarily fired hundreds of employees allegedly for trivialities, like a maid missing a piece of lint.
- Remorseless? Soon after Martin Davis ascended to the top position at Gulf & Western, a visitor asked why half the offices were empty on the top floor of the company's Manhattan skyscraper. "Those were my enemies," Davis said. "I got rid of them."
- Deceitful? Oil baron Armand Hammer laundered money to pay for Soviet espionage.
- Grandiosity? Thy name is Trump.
In the most recent wave of scandals, Enron's Fastow displayed many of the corporate psychopath's traits. He pressured his bosses for a promotion to CFO even though he had a shaky grasp of the position's basic responsibilities, such as accounting and treasury operations. Suffering delusions of grandeur after just a little time on the job, Fastow ordered Enron's PR people to lobby CFO magazine to make him its CFO of the Year. But Fastow's master manipulation was a scheme to loot Enron. He set up separate partnerships, secretly run by himself, to engage in deals with Enron. The deals quickly made tens of millions of dollars for Fastow - and prettified Enron's financials in the short run by taking unwanted assets off its books. But they left Enron with time bombs that would ultimately cause the company's total implosion - and lose shareholders billions. When Enron's scandals were exposed, Fastow pleaded guilty to securities fraud and agreed to pay back nearly $24 million and serve 10 years in prison.
"Chainsaw" Al Dunlap might score impressively on the corporate Psychopathy Checklist too. What do you say about a guy who didn't attend his own parents' funerals? He allegedly threatened his first wife with guns and knives. She charged that he left her with no food and no access to their money while he was away for days. His divorce was granted on grounds of "extreme cruelty." That's the characteristic that endeared him to Wall Street, which applauded when he fired 11,000 workers at Scott Paper, then another 6,000 (half the labor force) at Sunbeam. Chainsaw hurled a chair at his human-resources chief, the very man who approved the handgun and bulletproof vest on his expense report. Dunlap needed the protection because so many people despised him. His plant closings kept up his reputation for ruthlessness but made no sense economically, and Sunbeam's financial gains were really the result of Dunlap's alleged book cooking. When he was finally exposed and booted, Dunlap had the nerve to demand severance pay and insist that the board reprice his stock options. Talk about failure to accept responsibility for one's own actions.
While knaves such as Fastow and Dunlap make the headlines, most horror stories of workplace psychopathy remain the stuff of frightened whispers. Insiders in the New York media business say the publisher of one of the nation's most famous magazines broke the nose of one of his female sales reps in the 1990s. But he was considered so valuable to the organization that the incident didn't impede his career.
Most criminals - whether psychopathic or not - are shaped by poverty and often childhood abuse as well. In contrast, corporate psychopaths typically grew up in stable, loving families that were middle class or affluent. But because they're pathological liars, they tell romanticized tales of rising from tough, impoverished backgrounds. Dunlap pretended that he grew up as the son of a laid-off dockworker; in truth, his father worked steadily and raised his family in suburban comfort. The corporate psychopaths whom Babiak studied all went to college, and a couple even had PhDs. Their ruthless pursuit of self-interest was more easily accomplished in the white-collar realm, which their backgrounds had groomed them for, rather than the criminal one, which comes with much lousier odds.
Psychopaths succeed in conventional society in large measure because few of us grasp that they are fundamentally different from ourselves. We assume that they, too, care about other people's feelings. This makes it easier for them to "play" us. Although they lack empathy, they develop an actor's expertise in evoking ours. While they don't care about us, "they have an element of emotional intelligence, of being able to see our emotions very clearly and manipulate them," says Michael Maccoby, a psychotherapist who has consulted for major corporations.
Psychopaths are typically very likable. They make us believe that they reciprocate our loyalty and friendship. When we realize that they were conning us all along, we feel betrayed and foolish. "People see sociopathy in their personal lives, and they don't have a clue that it has a label or that others have encountered it," says Martha Stout, a psychologist at the Harvard Medical School and the author of the recent best-seller The Sociopath Next Door: The Ruthless Versus the Rest of Us (Broadway Books, 2005). "It makes them feel crazy or alone. It goes against our intuition that a small percentage of people can be so different from the rest of us - and so evil. Good people don't want to believe it."
Of course, cynics might say that it can be an advantage to lack a conscience. That's probably why major investors installed Dunlap as the CEO of Sunbeam: He had no qualms about decimating the workforce to impress Wall Street. One reason outside executives get brought into troubled companies is that they lack the emotional stake in either the enterprise or its people. It's easier for them to act callously and remorselessly, which is exactly what their backers want. The obvious danger of the new B-Scan test for psychopathic tendencies is that companies will hire or promote people with high scores rather than screen them out. Even Babiak, the test's codeveloper, says that while "a high score is a red flag, sometimes middle scores are okay. Perhaps you don't want the most honest and upfront salesman."
Indeed, not every aberrant boss is necessarily a corporate psychopath. There's another personality that's often found in the executive suite: the narcissist. While many psychologists would call narcissism a disorder, this trait can be quite beneficial for top bosses, and it's certainly less pathological than psychopathy. Maccoby's book The Productive Narcissist: The Promise and Perils of Visionary Leadership (Broadway Books, 2003) portrays the narcissistic CEO as a grandiose egotist who is on a mission to help humanity in the abstract even though he's often insensitive to the real people around him. Maccoby counts Apple's Steve Jobs, General Electric's Jack Welch, Intel's Andy Grove, Microsoft's Bill Gates, and Southwest Airlines' Herb Kelleher as "productive narcissists," or PNs. Narcissists are visionaries who attract hordes of followers, which can make them excel as innovators, but they're poor listeners and they can be awfully touchy about criticism. "These people don't have much empathy," Maccoby says. "When Bill Gates tells someone, 'That's the stupidest thing I've ever heard,' or Steve Jobs calls someone a bozo, they're not concerned about people's feelings. They see other people as a means toward their ends. But they do have a sense of changing the world - in their eyes, improving the world. They build their own view of what the world should be and get others recruited to their vision. Psychopaths, in contrast, are only interested in self."
Maccoby concedes that productive narcissists can become "drunk with power" and turn destructive. The trick, he thinks, is to pair a productive narcissist with a "productive obsessive," or conscientious, control-minded manager. Think of Grove when he was matched with chief operating officer Craig Barrett, Gates with president Steve Ballmer, Kelleher with COO Colleen Barrett, and Oracle's Larry Ellison with COO Ray Lane and CFO Jeff Henley. In his remarkably successful second tour of duty at Apple, Jobs has been balanced by steady, competent behind-the-scenes players such as Timothy Cook, his executive vice president for sales and operations.
But our culture's embrace of narcissism as the hallmark of admired business leaders is dangerous, Babiak maintains, since "individuals who are really psychopaths are often mistaken for narcissists and chosen by the organization for leadership positions." How does he distinguish the difference between the two types? "In the case of a narcissist, everything is me, me, me," Babiak explains. "With a psychopath, it's 'Is it thrilling, is it a game I can win, and does it hurt others?' My belief is a psychopath enjoys hurting others."
Intriguingly, Babiak believes that it's extremely unlikely for an entrepreneurial founder-CEO to be a corporate psychopath because the company is an extension of his own ego - something he promotes rather than plunders. "The psychopath has no allegiance to the company at all, just to self," Babiak says. "A psychopath is playing a short-term parasitic game." That was the profile of Fastow and Dunlap - guys out to profit for themselves without any concern for the companies and lives they were wrecking. In contrast, Jobs and Ellison want their own companies to thrive forever - indeed, to dominate their industries and take over other fields as well. "An entrepreneurial founder-CEO might have a narcissistic tendency that looks like psychopathy," Babiak says. "But they have a vested interest: Their identity is wrapped up with the company's existence. They're loyal to the company." So these types are ruthless not only for themselves but also for their companies, their extensions of self.
The issue is whether we will continue to elevate, celebrate, and reward so many executives who, however charismatic, remain indifferent to hurting other people. Babiak says that while the first line of defense against psychopaths in the workplace is screening job candidates, the second line is a "culture of openness and trust, especially when the company is undergoing intense, chaotic change."
Europe is far ahead of the United States in trying to deal with psychological abuse and manipulation at work. The "antibullying" movement in Europe has produced new laws in France and Sweden. Harvard's Stout suggests that the relentlessly individualistic culture of the United States contributes a lot to our problems. She points out that psychopathy has a dramatically lower incidence in certain Asian cultures, where the heritage has emphasized community bonds rather than glorified self-interest. "If we continue to go this way in our Western culture," she says, "evolutionarily speaking, it doesn't end well."
The good news is that we can do something about corporate psychopaths. Scientific consensus says that only about 50% of personality is influenced by genetics, so psychopaths are molded by our culture just as much as they are born among us. But unless American business makes a dramatic shift, we'll get more Enrons - and deserve them.
Alan Deutschman is a Fast Company senior writer based in San Francisco.
EdwardusI used to work as a software developer many years (and generations of hardware and software) ago. The large systems integration houses tend to assign their worst staff to government projects and governments complain less about quality of work, and are less likely to go ballistic when projects fail (and many certainly do in both private and public sectors). To put a career bureaucrat in charge (responsible/accountable on the RACI chart) of a complex software development project is irresponsible.
I also question why they had to build from scratch when production code is available from third-parties, some of it written for consumer-driven healthcare (CDHP) which shares some of the Obamacare functionality. While those systems are far less complex in terms of constraints and total functionality, the software core of these systems contain (once again) production grade code that have been tested extensively. Why on Earth anyone would want to build this from scratch is beyond my comprehension, unless of course someone wanted to enrich one or more government contractors.
If read some inept excuse about the project team not being able to perform beta testing. The combination of using production grade code would reduce part of that problem, and of course stress testing (!) the code for greater-than-anticipated volume of users and transactions would have revealed any design or environmental problems early.
naked capitalism
Michael Robinson
Unfortunately, I don't have time to rebut the sheer quantity of wrong in this article. I hope someone else who has experience delivering large software projects will come along to do so.
I will simply state that there is no "crisis" in software engineering. Software engineering practices have improved remarkably since the famous 1994 Standish Group Chaos study.
What has not improved at all in that time is the procurement and specification process. Software continues to be specified and purchased by people who are utterly unqualified to do so, and I have never seen any attempt by a procuring organization to impose any sort of accountability on those responsible for making critical decisions.
I've seen many projects that were doomed to failure from the moment they were greenlighted.
To use a civil engineering analogy, just because you want to build a bridge to Hawaii, and can find a salesman who will promise to build one for you, doesn't mean it is going to happen, no matter how much you beat up on the engineers.
Brooklin Bridge
Brooklin BridgePersonally, I think what you did is wonderful and only wish more people would try it. One of the strongest concerns I have regarding the direction computing is taking is that computer literacy in general and programming specifically is becoming so far removed from the general public and its needs and so tailor made for resolving problems on behalf of big business and big data only. Problems that Big Business uses invariably to extract more RENT from and more intrusive monitoring of the public and for little else.
In the early 90′s, it looked for a while as if Microsoft was truly going to provide a foundation for the democratization of computer literacy and software development. But then they took a sharp turn in the opposite direction. Soon after, they became lost, like everyone else, in the race to generate web based services for RENT EXTRACTION and to set up an environment – the cloud – where people increasingly HAVE to use them. Most people didn't even notice this trend and couldn't care less, they are utterly seduced by convenience, but it comes at a huge hidden cost and partly explains why violations of our privacy create such a collective yawn – people simply are NOT aware of what is going on, of how deep and intrusive the invasion of privacy is.
What the industry now calls easy programing languages such as Java and C# are not necessarily easy for the general public; they are easy for sweat shops full of poorly paid programmers that are hired to crank it out more and more quickly with less and less skill and definitely less and less craftsmanship, but they are not easy for the average person to just pick up. The software industry needs its own Charlie Chaplin to poke fun at the way the software industry is becoming more and more drone like and less and less human in its goals.
Why has OO not lived up to its promise? Object oriented design can be very difficult, for one thing. To make an elegant framework that publishes its functionality in an inheritable object oriented manner requires unusual skill and considerable practice.
Also, it doesn't always lend itself well to groups of Engineers where every one of them is to some degree the designer of his/her own solutions to their part of a project but who are not given time or don't have the inclination to develop a common set of objects between them.
You can have an extremely smart engineer who might do quite poorly when trying to think in OO. That doesn't mean his or her solutions to problems don't represent excellent solutions.
Then, OO's emphasis on hierarchy doesn't always adapt readily to modeling every problem. OO code can be wonderful at making tool kits and frameworks, such as a graphical interfaces; things that are specifically designed for subsequent use by other developers. But if your job is to design and implement some one-off that hooks up two protocols, by yesterday, OO design in its formal sense may be more than you want.
Frequently there is confusion about OO languages such as Java and C#. It is assumed that because they are object oriented by nature, their power derives from that aspect. But frequently developers get around this aspect when for what ever reason they don't want to design actual OO solutions. Make every procedure into an object and voila, you have OO code used in a procedural manner. Each object has little or no relation, and absolutely no hierarchical relation, to the objects surrounding it. They are called from a managing routine with the usual and traditional control flow directives.
But often the greatest power of these "interpreted" languages (run inside a virtual machine – often written in straight C), is in managing memory and other aspects of the code process that languages such as C++ left up to each developer and/or team with extremely diverse results running the gamut from true shanty town to absolutely sparkling and breathtaking Taj Mahals.
As to the three points Mr. Goodwin made, Standards, Transparency and Modularity/Simplicity, I always have problems with software evangelists no matter how brilliant or well presented their arguments are or how good their intentions.
A lot of these suggestions such as enforced standardization, and modularity would benefit business as rent extractor at the expense of innovation (and thus ultimately at the expense of business). It would direct the purpose of software to a narrow band of leggo applications and the result would tend towards an increasingly narrowly skilled set of programmers – particularly with the overtones of enforcement Mr. Goodwin requires of putting his views into practice. How many times have I heard the phrase, "Let's not re-invent the wheel", only to find that someone with no special license and no special authorization makes a MUCH better widget than the one that was supposed to be the "standard". It's called evolution and yet has the terminal flaw of timidity when forced into a world of GMO's where even the inventors must be authorized to invent.
Code requirements in the building industry are an excellent example of the dangers involved in this approach. Ten years ago there used to be essentially one book of code requirements for building residential homes. Now there are seven or eight. The average contractor simply doesn't have time to keep up with it all. Naturally, one can argue that as we develop more and more restrictions on what one can do, and more and more requirements on what they must do, we are making the buildings safer and more energy efficient. And that is true as far as it goes. But we are also making them expensive to the point no one except big business can afford to build them and no one except big business can afford to buy them and they come with so many restrictions about what even the home-owner can do that no one would want to live in them. Indeed, they DO satisfy all the requirements Mr. Goodwin specifies above, but the outcome is essentially that everyone will end up renting them. And as to innovation, forget it. Just plain forget it unless it is officially sanctioned or unless you are very rich (the two are usually one and the same). It may start out that everyone can be "innovative" with software as much as they want to, say in their own officially sanctioned play pens, but end up, as with building codes, being illegal to even own a compiler without obnoxious and often corrupt code inspectors sniffing around at every turn.
Brond
bobAs a physics PhD with 25 years experience working in software engineering, I've heard and considered the building analogy before. I always find that it misleads more than it illuminates. Here are some of the reasons.
(1) Building is based on slowly evolving properties. The size of people does not change over time, nor do the properties of wood or the laws of physics. Software is built to run on systems which have increased in performance by many many orders of magnitude in relevant dimensions over just a few decades. Economics dictates that large software systems take advantage of this fire hose of new performance. Software projects that delay time to market in order to build in much future extensibility fail. Nor do the relevant dimensions change at the same rate. Over just a decade this can open up a relative order of magnitude or more between two of the dimensions (say, bandwidth to SSD vs bandwidth to disk). This rate of change means completely reorganized software systems become (un)economic over little more than a decade. Simple scale-up does not work for long.
(2) Software can be copied free, unlike buildings. We never build the same thing twice. True, applications that are popular and similar enough spawn frameworks and automation tools (think thick-client apps during the 90′s and three tier web apps in the 2000′s). Then, given (1), the very monoculture of these opens up competitive opportunities for doing better for some important subclass of the problem space (think, NoSQL databases).
(3) Software system testing faces more challenges than than do physical systems. There are several reasons which bear on this. Building materials have very good continuum approximations – we don't have to model atomic scale structure to understand when a beam will fail. So far, there are few similar effective descriptions for software systems which offer compositional utility together with the kind of guarantees that can enhance reliability testing (operating systems are relatively good at hiding hardware details–maybe the most important success) Also most software has very complex inputs and outputs, and the flow of information down the layers is also very complex - it's "all surface" compared with the physical interface of, say, a tunnel or bridge. Think of modeling a fractal bridge as an analogy and you won't be far wrong. It might be objected that these are deficiencies of software engineering, and not inherent in the undertaking. I won't argue it, but they are not easily solved, and building analogies won't help solve them.
(4) Building codes involve the legal system. Now consider for a moment the speed at which the legal system adapts to change in the world (sometimes with very good reason), and the political forces which are involved. There is a huge impedance mismatch between the legal and the techno-economic evolution of (1).
So, it would be nice, and good luck to you with helping it happen. We shall watch your future career with interest!
If you're driving too fast to be able to pay attention, the normal, logical step is to SLOW DOWN. Cursing the road or the car for being too old and slow does not help.
smbresource.com
What is the definition of micromanagement? Micromanagement is generally defined as exercising excessive control of a project or group of people. The fuzziness comes in to play when we try to determine what is considered excessive. Clearly this is in the eyes of the beholder. The employee will generally have a much lower threshhold than the manager.
....
When is micro managing bad ? When a manager, director or other executive tries to micro manage every person and every project productivity is lost. There is simply no way around it. An effective manager is responsible for multiple projects and many people. When he tries to exert to much influence over too many things, he can't help but to lose focus on the bigger picture. As attention becomes focused on one aspect of the business, the inter relationships and integration of projects becomes lost in the fog, or worse, on-going complementary projects are changed, and forced to fit with the project the manager is detailing. The higher the level of management, the more dangerous this becomes....
... ...
How do you know when you are over managing? There is no set rule of thumb. The surest indicator is if you are bouncing from project to project and person to person with most of your time. A good guide is to try and minimize your hands on attention to detail to know more than twenty or twenty-five percent of your time depending on the situation. The rest of your time should be spent on evaluating employees, budgeting, increasing the skill level of your staff, and other more traditional management functions.
techrepublic.com
Where is the Real Value ?
It can take me several hours just to set up Outlook to file the email that I really don't care about automatically...
Or to report my time, according to different criteria; to multiple time reporting systems (which generally are hideously unfriendly)... And make sure they all match regarding Totals and Projects. Too often sub-tasks are really meaningless burdensome breakdowns based on micro-management methodologys - or some bug infested Excel document that has partly-coded relationships and Totals...
Project micromanagement is often just in the way of figuring out what needs to be done and doing it.
Some of the Document templates that have been developed are an exercise in wasted time - heck I just had a small project to add a field to an extract file, had it coded and ready to implement...then the Project Lead asked me to generate a Specification Document using a 40+ page template - well that is taking longer than the work to do the change itself.
And I'm still envisioning the value added by requiring mixed-case alpha and numeric passwords changed frequently on platforms that have conflicting rules so that the passwords end up differing - a real technological plus would be to use a fingerprint instead (and don't ask me to change it weekly either)...
What's needed is vigilance about if we're working for the technology - or if it's working for us...
managee.blogspot.com
Today, I'll write something so obvious that I'm almost ashamed of it. I thought if there's anybody who doesn't know that, but I still see lots and lots of people who act like they should read below advices. There's a second reason also – it's always worth to remind to myself these points.
Micromanagement, that's what I want to write about today. Why is it bad? There's a bunch of reasons:
Manager can't do everyone's work. He has in the team 5, 10 or maybe 50 people, so in every case they do more than a single person could. Even if he's a superhero. Even if there's only one person in the team. Remember the manager has his own work. Oh, at last he should have some.
Manager's competence doesn't cover all competence in her team. She usually isn't the best developer, the best tester, the best project manager. She has the best managerial attributes. Oh, at last she should have some. That's why she's the boss. I hope that's the reason, in other case I offer my condolences to you.
Telling people how exactly they should do their tasks is usually stupid because they usually know better. They are closer to issues, closer to code/functionality/project plan/whatever and they work on that every single day (not only during micromanagement day of the week). Manager is like a driver – he can say if the car looks nice and drives fast. His team is like mechanics – they know what exactly happens in the engine. You'd rather ask the mechanic, not the driver how to fix brakes in you car, wouldn't you?
In these several cases when the manager knows better what to do and how to do, telling people how exactly they should do their tasks is stupid, because people don't learn accountability then. If the manager taught them micromanaging, they won't take initiative, won't be creative and won't look for improvements of their work. Why should they? That's the manager who tells them exactly how to work. But remember, she doesn't have the time to micromanage every single person on regular basis. Even if she's a superhero.
Yeah, stupid indeed. It's obvious. Why to write about that? I'll answer with a question: why so there's still so much micromanaging?
I think reasons are different. When I recall micromanagers I met they're driven by different demons. There're two I Know It Better demons – first when the manager really know better how to deal with a task or an issue and second when he thinks he knows. The latter is much more common. There's Do What I Say demon, when it doesn't really matters if the solution is right or wrong, it's all about doing what the manager said just to support his ego. There's You Don't Know The Big Picture demon, when micromanaging is justified with lack of wide knowledge about whole situation within the team. Nothing easier but to share the knowledge. There're of course others, but those are the most common.
You should listen none of them. There's always a better way to deal with the task or the issue than micromanaging. You can come with your idea in every situation but don't treat yourself as unmistakable, because you're not (I bet). Bring discussion and be open to change your mind if someone, especially someone who'll actually do the work, comes with another idea. And tell people what to do, not how to do that.
kuro5hin.org
Introduction
Most textbooks and methodology guides start with statistics proving that software projects are disastrously prone to failure. I'll take that for granted.
They then propose complicated rules designed for a fantasy business world where cooperative workers idealistically work towards the common goal of maximizing shareholder value.
A couple of weeks in a typical office should disabuse you of that. Real world companies are made up of individuals working for their own goals: career advancement, more money, or just the chance to slack off. Occasionally it may be in someone's interest to build a successful project. Usually it's more useful to sabotage it.
This leads to the real reason for the perpetual software crisis:
1. Most software fails because it is designed to fail
Why you should want your project to succeed
A developer rarely benefits from the failure of his project. There are exceptions, such improving your resumé by choosing bleeding-edge technology that may also cripple the project. However, few developers escape the consequences: they may be stuck maintaining an inadequate system long after the project manager has moved on to better things.
In addition, since management is a less specialized skill, it is easier for a manager to change jobs than it is for a developer.
Sabotage
There are two kinds of sabotage: deliberate and incidental.
The direct manager of a project has an incentive to see the project succeed. As we will see later, he may also have incentives to make the project fail, but generally he wants to get it working, at least in the short term until he gets promoted.
In most companies, promotion is competitive. This means that the direct manager's competitors have an incentive to make him fail: deliberate sabotage. This tendency is most prevalent in non-software houses that have several teams of in-house developers. It obviously doesn't arise if there is only one software development manager, and in software houses the chance of expansion renders the competition less fierce.
Because everyone has to pay lip service to the good of the company, deliberate sabotage has to be disguised as incidental sabotage. Nevertheless, be aware that it's a good idea to keep sensitive information, such as estimates and necessary purchases away from potential rivals. Beware of casual conversations with the enemy.
If you've ever been a part of a large development project, you've no doubt become accustomed to having access to source control and bug tracking tools and design document repositories. But what if you're part of smaller project where you're responsible for setting up your own infrastructure? Trac, an open source project sponsored by Edgewall Software Services, provides a complete project infrastructure that's easy to install and maintain.
Trac integrates a capable wiki engine with a number of project management features. In particular, Trac provides a Web-based interface to a Subversion source code repository, a job/bug ticketing system, and basic scheduling features. Each of these is integrated with the wiki engine. Trac can be readily adapted to nearly any project management style.
For the purposes of this article, we'll assume that you use Subversion for your source control system. If you're not familiar with the software, you may want to review my recent article on using Subversion or take a look at the Subversion Book to get started. You will also need a Python 2.3 installation, the python bindings for your installation of Subversion, and an installation of PySQLite; use version 1.x or below, as the current stable version of Trac doesn't support PySQLite2.
Users of Debian-based Linux distributions can install all of these prerequisites and Trac itself by simply executing
apt-get
   install trac
as root. Packages for Trac can be often be found in other repositories for distributions such as Fedora. There are Microsoft Windows binaries for Python, the Subversion python bindings, and PySQLite as well. If none of these options serve, the Trac Web site has information for installing Trac on a variety of platforms.The simplest deployment of Trac, which we'll outline here, involves using its own built-in Web server. For small to medium internal projects, this configuration should prove more than adequate. For larger or externally deployed projects, investigate Apache-based deployment options.
There are two commands that are important in the Trac distribution:
trac-adminandtracd. In most Linux distributions they'll be found in /usr/bin or /usr/local/bin. For Windows installs, these commands will generally be found in Python installation directory\Scripts.To create your Trac project you must choose a location in which Trac will keep its data. For our purposes we'll assume the directory /path/to/MyTracProject. (On Windows it could just as easily be C:\MyTracProject.) Trac must also know the location of your Subversion repository (we'll use /path/to/SubversionRepository). Given this information, use the
initenvcommand to initialize the project:
$ python trac-admin /path/to/MyTracProject initenv /path/to/SubversionRepositoryAfter initializing your Trac project you should able to run:
$ python tracd --port 8080 /path/to/MyTracProjectto start the built-in Trac server. Then, simply browse to http://localhost/MyTracProject:8080 to take a look at your initial Trac project.
One thing that you'll notice is that the Trac wiki is pre-populated with pages that document the Trac system. For example, the wiki page at http://localhost:8080/MyTracProject/wiki/TracGuide is the table of contents for the Trac documentation.
You can use the
trac-adminscript to configure other aspects of your project. Let's use it to add some project components and some scheduling milestones. While we're at it, we'll remove the sample milestones and components that Trac places in its database. The following commands will give you the flavor of working with the Trac administrative tool. There is also ahelpcommand that provides a summary of all of the available administration commands.
$ python trac-admin /path/to/MyTracProject

   Delete default components

   Trac [/path/to/MyTracProject]> component delete component1

   Trac [/path/to/MyTracProject]> component delete component2

   Add a GUI and Database component

   Trac [/path/to/MyTracProject]> component add GUI

   Trac [/path/to/MyTracProject]> component add Database

   Delete the default milestones

   Trac [/path/to/MyTracProject]> milestone delete milestone1

   Repeat the above command for milestones 2,3, and 4

   Then add an Alpha, Beta and Release milestone

   Trac [/path/to/MyTracProject]> milestone add Alpha

   Trac [/path/to/MyTracProject]> milestone add Beta

   Trac [/path/to/MyTracProject]> milestone add Release
Once you've set up the basic structure of your project you can begin to actually populate it. The toolbar at the top of the Trac Web pages lets you browse your project wiki, look at your project schedule (called the "Roadmap" in Trac), enter tickets (which can be bug reports or "todo" tasks or a combination), and browse through your Subversion repository.
The real power of Trac is its ability to adapt itself virtually any project management style. Trac honors wiki formatting across the entire Trac-managed project. Naturally enough, Trac's wiki supports a full range of the usual wiki formatting behavior for links to other wiki pages, lists, emphasis, and so on. Trac, however, also supports special markup for creating links to milestones (
milestone:Alpha), tickets (ticket:121), and source code (source:trunk/MyCode.cc). Thus, you can create wiki pages that organize access to any useful selection of project characteristics. Then, to extend the concept, Trac honors wiki formatting not only in wiki pages but in ticket descriptions and even Subversion check-in comments.With this ability to interlink various aspects of your project you can create a living view of your project's status. Consider a project being run using agile methodologies. Wiki pages can be used to describe user "stories" or use cases. These pages can be linked to "iterations" that are entered as the project milestones. Developer tasks can be entered as tickets associated with the appropriate iteration or milestone. As code is checked in to satisfy a particular developer task, the check-in comment can identify the task with a link to it. Thus, the project's state can be reviewed from virtually any perspective, where appropriate details are accessed with the click of a mouse.
In addition to integrating well with itself, Trac provides a number of features that allow it to integrate well with the outside world. The URL scheme in Trac is constructed in a very sensible and predictable fashion. For example the URL in "MyTracProject" for the Alpha milestone pages would be http://trac.myco.com:8080/MyTracProject/milestone/Alpha. The URL for the seventeenth ticket is http://trac.myco.com:808/MyTracProject/ticket/17. Thus, it is quite easy to compose blog entries or emails that refer to aspects of a Trac-managed project. Trac also has the ability to create reports using SQL
selectstatements against the ticket table in the Trac database, allowing you to provide customized reports for project stakeholders.All of this shows that any project, regardless of its size, can take advantage of Trac's powerful and sophisticated planning, monitoring, and reporting infrastructure. With a small investment of time, you can deploy and adapt Trac to your project management strategy, allowing you to concentrate on moving your project to completion and success.
Google matched content |
Internal
External
Slashdot Book Excerpt The Art of Project Management
How to detect bullshit - scottberkun.com
How to survive a bad manager - What to do when you work for someone who doesn't know what they're doing.
Software Project Management Resources -- Columbia University
Free Software Project Management HOWTO
Free Software Project Management Tutorial and Course and Guide
Interesting book dispenses much needed advice, February 2, 2006
Perhaps one of the reasons I am still doing engineering work rather than supervising it 26 years after I received my BSEE is that I could never properly wrap myself around exactly what it takes to manage a project. I therefore approached this book with a great deal of trepidation. However, after I began reading it I became pleasantly surprised. Most project management books I've read in the past intersperse advice on project management with software engineering techniques and Tony Robbins style motivational anecdotes.
Reviewer: calvinnme "Texan refugee" (Fredericksburg, Va) - See all my reviews This one sticks to the subject and is well organized. The book is not about any one specific project management methodology, but about fundamental aspects of all projects. The author recounts his own experiences while managing projects at Microsoft to provide insight into the less transparent aspects of project management.
The book is divided into three major sections: "Plans," "Skills," and "Management." This organization provides a logical flow overall and allows topics to build on one another. In spite of this logical progression, the chapters are fit for random access, as the author himself recommends. One of my favorite chapters was "Figuring Out What To Do". Here the author outlines three basic perspectives: The business perspective, the technology perspective and the customer perspective. The author states that although the customer perspective is the most important of all three that is the most neglected and is the reason that many projects fail.
The chapter "How Not To Annoy People: Process, Email, and Meeting" was another chapter I really enjoyed. It offers down-to-earth recommendations on dealing with annoying behavior which the author lists in five categories:
When others
1. assume you're an idiot.
2. don't trust you
3. waste your time
4. manage you without respect
5. make you listen to or read stupid thingsSince I've been guilty of being on the giving end as well as the receiving end of some of this behavior, this chapter helped me see some of the trouble I can cause myself as well as how I can effectively deal with it when it comes from others.
However, this book is more than just about how to deal with socially backwards misanthropes such as myself. It dedicates considerable space to creativity, dealing with ideas once you have them, making ideas actionable by using affinity diagrams to consolidate ideas, and employing iterative prototyping.
The third section of the book, which is specifically about management issues, contains chapters such as "Why Leadership Is Based On Trust". In that chapter the author points out that trust is built through commitment but lost through inconsistent behavior. Leaders must develop enough trust that people will bring issues to them during crises instead of hiding them. Trust, then, is at the core of leadership. Part of the reason that people will not trust some leaders is dealt with in the chapter "Power and Politics." Specifically, the author points out that power is misused when people work towards their own self-interest. If that person is a leader, and other people take note of this misuse, trust is lost.
In summary this book has much to say about all phases of project development as well as management. Highly recommended.
"The beginning is the most important part of the work.", November 23, 2005
Christopher Byrne "The Business Controls Caddy" (Atlanta, GA USA) - See all my reviews
"The beginning is the most important part of the work." So says Plato in The Republic. So perhaps it is fitting that The Art of Project Management (Scott Berkun, O'Reilly 2005, 396 Pages, ISBN 0596007868) is written by an experienced project manager that studied not only computer science and design, but philosophy as well. Clearly and thinking man, his thoughts and experiences as a product manager at Microsoft are tied into historical perspectives of grand projects of history, and translated into an easy to read and follow format. It does not matter if you are the sole developer on a project, part of a team, or the leader of a project. This book provides valuable wisdom and insight that the success of a project is dependent on strong project management and planning from the beginning to the bitter end.From The Pyramids To The Kitchen
Berkun is keenly aware of and believes in the notion that project management is not a new concept. At the start of the book, he takes us back to the days when the great pyramids were built and to the present with thoughts about modern-day restaurant kitchens. The latter is highly organized chaos, much like flight operations on an aircraft carrier. In the busy kitchen, everything is run so smoothly and efficiently despite constant flux in the environment. It is the history of project management and how it works outside peoples' normal thought processes that Berkun challenges the reader with from the beginning.
Learning From Failure
Berkun, who openly acknowledges the mistakes, failures, and challenges of his time at Microsoft is clear that organizations need to dissect every project after the fact so that lessons can be learned and applied. Throughout the book, he also emphasizes the importance of planning and setting realistic milestone schedules that can react easily to changes without major impact. The author then leads the reader through each step of the project life cycle, interjecting thoughtful discussion and not just rigid "book rules" and theories. He acknowledges the place of theory, especially in decision making, yet shows their limits when it comes to real life, time-constrained decision making.
For this reader, the biggest strength of the book is its continual focus on the human dynamics associated with communication, leadership, and politics surrounding. Berkun argues that unless these are mastered, any project is doomed to failure.
Who Should Read This Book?
This book should be read by any system administrator or application developer involved in any size project. It should be read by people who want to be or are program managers, It should be read by those who manage project managers. And finally, it should be read by information technology compliance and governance professionals from two perspectives. The first is two understand the dynamics of project that pose governance challenges. the other is to see how they can apply the principles to their governance implementations.
...
Society
Groupthink : Two Party System as Polyarchy : Corruption of Regulators : Bureaucracies : Understanding Micromanagers and Control Freaks : Toxic Managers : Harvard Mafia : Diplomatic Communication : Surviving a Bad Performance Review : Insufficient Retirement Funds as Immanent Problem of Neoliberal Regime : PseudoScience : Who Rules America : Neoliberalism : The Iron Law of Oligarchy : Libertarian Philosophy
Quotes
War and Peace : Skeptical Finance : John Kenneth Galbraith :Talleyrand : Oscar Wilde : Otto Von Bismarck : Keynes : George Carlin : Skeptics : Propaganda : SE quotes : Language Design and Programming Quotes : Random IT-related quotes : Somerset Maugham : Marcus Aurelius : Kurt Vonnegut : Eric Hoffer : Winston Churchill : Napoleon Bonaparte : Ambrose Bierce : Bernard Shaw : Mark Twain Quotes
Bulletin:
Vol 25, No.12 (December, 2013) Rational Fools vs. Efficient Crooks The efficient markets hypothesis : Political Skeptic Bulletin, 2013 : Unemployment Bulletin, 2010 : Vol 23, No.10 (October, 2011) An observation about corporate security departments : Slightly Skeptical Euromaydan Chronicles, June 2014 : Greenspan legacy bulletin, 2008 : Vol 25, No.10 (October, 2013) Cryptolocker Trojan (Win32/Crilock.A) : Vol 25, No.08 (August, 2013) Cloud providers as intelligence collection hubs : Financial Humor Bulletin, 2010 : Inequality Bulletin, 2009 : Financial Humor Bulletin, 2008 : Copyleft Problems Bulletin, 2004 : Financial Humor Bulletin, 2011 : Energy Bulletin, 2010 : Malware Protection Bulletin, 2010 : Vol 26, No.1 (January, 2013) Object-Oriented Cult : Political Skeptic Bulletin, 2011 : Vol 23, No.11 (November, 2011) Softpanorama classification of sysadmin horror stories : Vol 25, No.05 (May, 2013) Corporate bullshit as a communication method : Vol 25, No.06 (June, 2013) A Note on the Relationship of Brooks Law and Conway Law
History:
Fifty glorious years (1950-2000): the triumph of the US computer engineering : Donald Knuth : TAoCP and its Influence of Computer Science : Richard Stallman : Linus Torvalds : Larry Wall : John K. Ousterhout : CTSS : Multix OS Unix History : Unix shell history : VI editor : History of pipes concept : Solaris : MS DOS : Programming Languages History : PL/1 : Simula 67 : C : History of GCC development : Scripting Languages : Perl history : OS History : Mail : DNS : SSH : CPU Instruction Sets : SPARC systems 1987-2006 : Norton Commander : Norton Utilities : Norton Ghost : Frontpage history : Malware Defense History : GNU Screen : OSS early history
Classic books:
The Peter Principle : Parkinson Law : 1984 : The Mythical Man-Month : How to Solve It by George Polya : The Art of Computer Programming : The Elements of Programming Style : The Unix Hater’s Handbook : The Jargon file : The True Believer : Programming Pearls : The Good Soldier Svejk : The Power Elite
Most popular humor pages:
Manifest of the Softpanorama IT Slacker Society : Ten Commandments of the IT Slackers Society : Computer Humor Collection : BSD Logo Story : The Cuckoo's Egg : IT Slang : C++ Humor : ARE YOU A BBS ADDICT? : The Perl Purity Test : Object oriented programmers of all nations : Financial Humor : Financial Humor Bulletin, 2008 : Financial Humor Bulletin, 2010 : The Most Comprehensive Collection of Editor-related Humor : Programming Language Humor : Goldman Sachs related humor : Greenspan humor : C Humor : Scripting Humor : Real Programmers Humor : Web Humor : GPL-related Humor : OFM Humor : Politically Incorrect Humor : IDS Humor : "Linux Sucks" Humor : Russian Musical Humor : Best Russian Programmer Humor : Microsoft plans to buy Catholic Church : Richard Stallman Related Humor : Admin Humor : Perl-related Humor : Linus Torvalds Related humor : PseudoScience Related Humor : Networking Humor : Shell Humor : Financial Humor Bulletin, 2011 : Financial Humor Bulletin, 2012 : Financial Humor Bulletin, 2013 : Java Humor : Software Engineering Humor : Sun Solaris Related Humor : Education Humor : IBM Humor : Assembler-related Humor : VIM Humor : Computer Viruses Humor : Bright tomorrow is rescheduled to a day after tomorrow : Classic Computer Humor
The Last but not Least Technology is dominated by two types of people: those who understand what they do not manage and those who manage what they do not understand ~Archibald Putt. Ph.D
Copyright © 1996-2021 by Softpanorama Society. www.softpanorama.org was initially created as a service to the (now defunct) UN Sustainable Development Networking Programme (SDNP) without any remuneration. This document is an industrial compilation designed and created exclusively for educational use and is distributed under the Softpanorama Content License. Original materials copyright belong to respective owners. Quotes are made for educational purposes only in compliance with the fair use doctrine.
FAIR USE NOTICE This site contains copyrighted material the use of which has not always been specifically authorized by the copyright owner. We are making such material available to advance understanding of computer science, IT technology, economic, scientific, and social issues. We believe this constitutes a 'fair use' of any such copyrighted material as provided by section 107 of the US Copyright Law according to which such material can be distributed without profit exclusively for research and educational purposes.
This is a Spartan WHYFF (We Help You For Free) site written by people for whom English is not a native language. Grammar and spelling errors should be expected. The site contain some broken links as it develops like a living tree...
|
|
You can use PayPal to to buy a cup of coffee for authors of this site |
Disclaimer:
The statements, views and opinions presented on this web page are those of the author (or referenced source) and are not endorsed by, nor do they necessarily reflect, the opinions of the Softpanorama society. We do not warrant the correctness of the information provided or its fitness for any purpose. The site uses AdSense so you need to be aware of Google privacy policy. You you do not want to be tracked by Google please disable Javascript for this site. This site is perfectly usable without Javascript.
Last modified: June 11, 2021